


Here's what you need:
Materials
• 1 yard cotton fabric - I go for a cheaper muslin type fabric
• Black fabric paint
• Paint brushes
• 2 - 3 sheets of felt - I use red
• Cardboard, cardstock, or blank stencil paper
• Scissors, rotary cutter, and ruler
• 4 buttons
• Needle and embroidery thread
• Large sheet of cardboard or drop cloth
• Rotary mat if you have one
• Paper towel or scrap fabric
• Pen
*The following instructions are for a 20in pillow cover.
1. Measure & cut your pillow. You'll be cutting three shapes. One that is 25in x 25in, another that
is 25in x 18in, and the third is 25in x 6in.
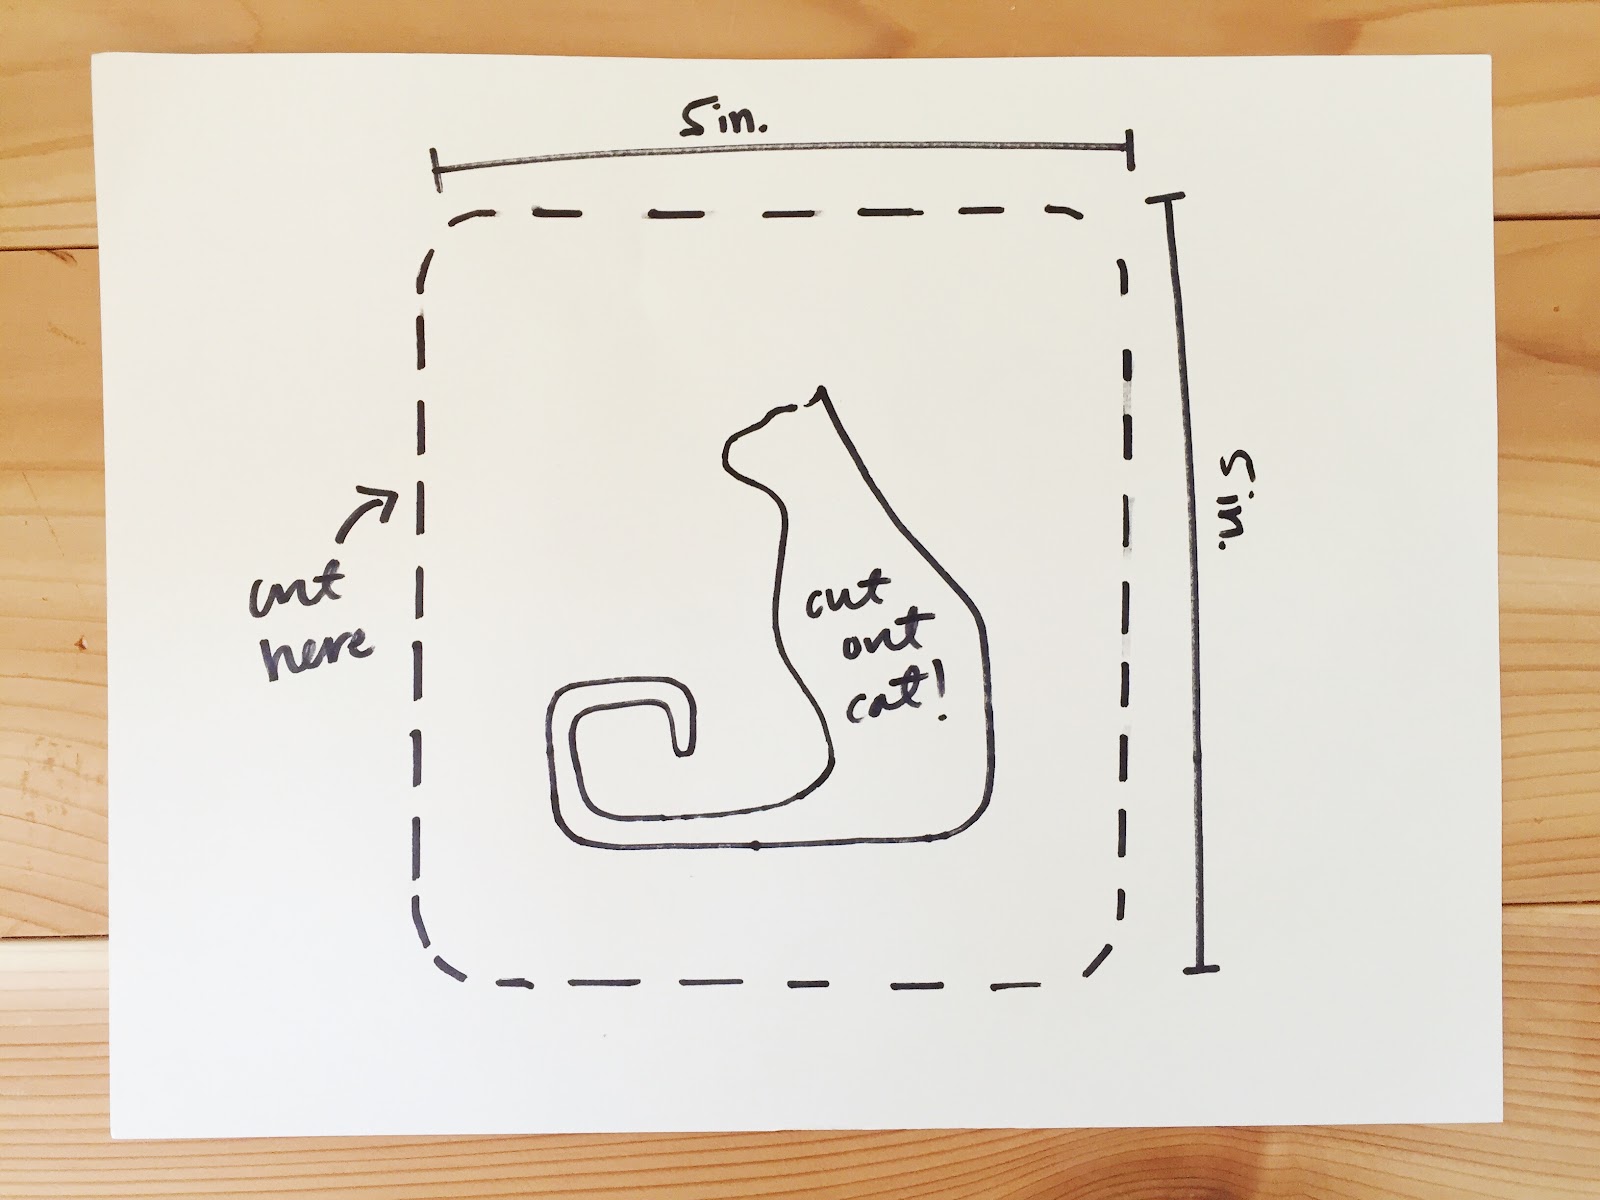
2. Make your stencil. Using either your card stock or tracing paper, use the template provided and
trace your cat. You'll be making a 5in x 5in stencil -- this will help with the painting process.
*Tip: You can also google "cat silhouette" if you prefer a different style cat.
3. Paint your fabric. On a surface that you don't mind getting paint on, line your stencil up on the
far left, bottom corner. Begin painting your cat.
*Tip: Pull your brush from the outline to the center, this cuts down on any bleeding and rough
edges.
4. Spacing your stencil. Once the first cat is done, wipe the back of your stencil and move it over
5in. Continue like this till you are finished with row one. For row two, you'll move your stencil
up 4 inches and in 3.5. This will put your second row right in between row one. Continue until
your entire pillow front is painted. Once that's done, move it to an undisturbed area to dry for at
least 8 hours. Once it is dry, it will also need to be washed to set the paint.
5. Cut the letters. For this, I drew my letters. But another option is to print out the letters from a
font you love, and use those to trace.
*Tip: Trace your letters onto the felt backwards, that way any remaining pen ink shows on the
back, but not the front.
6. Lay out the letters. Using your ruler, lay and center your letters onto your fabric. Pin them into
place. Take your time measuring, you'll be glad you did!
7. Sew your letters. Using a similar or contrasting thread, straight stitch your letters into place. If
you aren't so handy with a machine, you could also sew these on by hand.
8. Making the back. Remember those smaller rectangles we made in the beginning? It's their turn
on the sewing machine. Fold the edges over 1 in. then over again 1 in. These will be the future
home of your buttons and buttonholes.
9. Assemble the pillow. This is sort of like a pillow sandwich. Lay the front of your pillow face
up, then lay the shorter rectangle face down, then the long rectangle over that, face down also.
Pin it all together, then straight stitch or serge the sides.
10. Button it up. Using your ruler again, measure where you would like to place the buttons and
make a small mark on either side. Using your button presser foot, make your button holes. If you
don't know how to do that, watch this. Then use your needle and thread to attach the buttons.
You did it! Now you can make new stencils, different phrases, and make this pillow totally your own. And don't forget, if you don't want to make one, you can purchase one here!
Happy sewing you crazy cat people.
xoxo Sallie


This comment has been removed by a blog administrator.
ReplyDelete