Family Tree Silhouette DIY


Today, my parents celebrate 40 years of marriage. FORTY YEARS! This is a huge milestone, and I really wanted to give them something special to commemorate this very special event.


 When I started pinteresting (is that a verb?) 40th anniversary gift ideas, it was, pardon my French, all crap. There was no shortage on ruby colored jewelry and tacky cards. I ended up making my way to my mom's Pinterest and came across this image. I loved the idea of silhouettes, but we have too many people in our family to do individual frames. I then thought about just doing individual frames of my mom and my dad, but that didn't really seem like something they would appreciate. I ended up landing on this idea, a family tree done in profile silhouettes. 

Here is how I did it! 

STEP ONE: Gather pictures of everyone's side profile. Special thanks to my family for quickly sending me pictures of your faces!

STEP TWO: Load all these pics onto your computer, so they can eventually make their way into photoshop. 

STEP THREE: I would like to preface this next part by saying, I am not a graphic designer and I am  100% sure there is a much better way to do this. This is the way I did it, and for those of you new to photoshop, this may be an easier alternative! 

First, open photoshop and create a new canvas. I made mine 8 x 10in. Bring your picture into photoshop by dragging it in. 


Once you photo is in, you will need to rasterize the layer. You can do that by right clicking and hitting "rasterize layer" in the nifty little window that pops up.


Now the controversial part, I used the polygonal lasso tool to cut out my face from the picture. The better way to do this would be to use the pen tool, but as that requires more skill and patience (two things I lack in photoshop) I trusted my handy lasso. Here it is in the flesh. 


Start by choosing a start point around the outline of our face. I started at my forehead, and then with small clicks every few mm, created a smooth line. I only went from my forehead to my nose, before clicking off my outline, connecting back to my start point which gives you a "circle" or "area" that you can delete. You will know that you've made a full connection when the line becomes a dashed line that magically starts moving. 


Once you have the magic dashed line, hit delete which will take out the background, and then "command D" which will deselect that area. 


So now you see, the background of the picture is gone behind my forehead. I resumed at the bridge of my nose, adding more points around the curves of my face, completed the loop, delete, and then so on and so forth. 


You do this until your head is completely cut out, like so. Notice at the base of my neck I created a rounded edge--similar to traditional silhouettes. You can also give yourself a neck lift if you are feeling a little saggy. 


Once face is completely cut out, its time to black it out! Simply double click your layer, select color overlay in the menu that pops up, and wallah! My menu was already selected to black, but you could choose any color you wish.


Once you have your faces cut out, you can make a new canvas/board in photoshop or illustrator. I went for an 14 x 11in. You can drag your faces in, resize and rearrange. Using your shape tool, you can make an oval for a border and also add text. I also played around with the pen tool to create some shapes. You can find free vector "banners" online that you could add text to. Possibilities are sooo endless.


STEP 4: Once you are happy with your final design, all you have to do is print it! Per my trusted graphic designer pal Venny who helped me lay all of this out, I went with a thicker glossy paper. I am sure FedEx office could help you out on the cheap. 


STEP 5: Now the presentation. The great thing about doing a print at 11 x 14in, is that you have lots of options when it comes to pre-made frames. I picked this one up at Hobby Lobby, used my 40% off coupon and got it for a steal of a deal! 

There you have it folks, a gift that will make your mom cry, and piece that I hope will stay in my parent's home for another forty happy years. 

Happy Anniversary Mama and Dad! I sure do love ya!

xoxo Sallie

P.S. Huge thank you to Venny who helped lay this out for me and made it all look beautiful! You rock!

Summer Mini Pies


I don't want to sound braggy, but I am really good at making pies. Like REALLY good. It's one of my strengths. What I lack in cake baking, I make up for in pie making. I especially love this season because fruit is at it's peak and it's a great time to pour sugar and butter all over it and make a pie.

Home Tour: The Dining Room


Adjacent to our living room, is our dining space. We use it for many important things, like holding mail and my purse. But seriously, we do use this space and I am hoping that someday when we start a family we'll have regular meals together in our dining room.


Home Tour: The Living Room


Three years ago this past September, Andrew and I packed up our first apartment and moved into our first home. It was so exciting! We purchased a foreclosure that had been completely remodeled and had all the charm of an old house, with all the modern conveniences of a new home (like HVAC!). I absolutely adore this home, and God has been so good to us while we've been here.

Like I said, Andrew and I have been here for almost 3 years, and it has taken EVERY bit of that time to make this house look the way I want it to. Not because we had major cosmetic work to do, but because it has taken this long for me to define my style. Andrew and I have had a lot of help -- my parents have been so generous in giving us some of their old things, but we have also thrifted, foraged, salvaged, and crafted every part of our home. And somehow, through all the mismatch, and variety, we have pulled it all together and created our own funky little style. So, without further adieu, I give you, the living room!


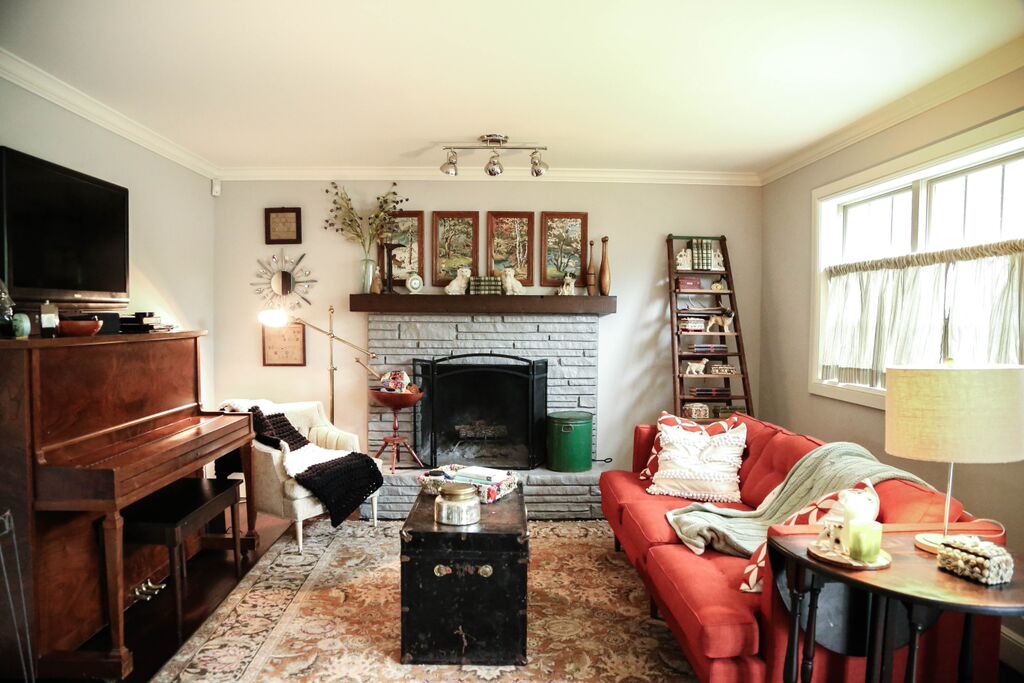
This is our living room currently, well almost. I have a new lamp on that table, and a split leaf by the piano, but it's pretty darn recent! To contrast, this is our living room three years ago.


Big difference, huh! That's what I meant when I said it's taken some time to put this together! Here are a few things we did to make this space better. 


We found a piano! Notice I didn't say bought, because we actually found this piano on Craigslist for FREE! All we had to do was move it (thank you Nick, Matt, Jordan and other various friends for helping!)


My mom decided to replace a rug in her kitchen, so we inherited this one. I wasn't a huge fan at first, but this has become one of my favorites. It's an 8 x 10 which is a much better fit in our space than the old 5 x 8. 


We also purchased a couch. You might notice this is the Peggy Sofa from West Elm, but we actually bought this couch 2 weeks used on Facebook for $400. Not. Even. Kidding. It was a huge answer to prayer, and not to mention fits our space a lot better than our old Pier 1 couch. 


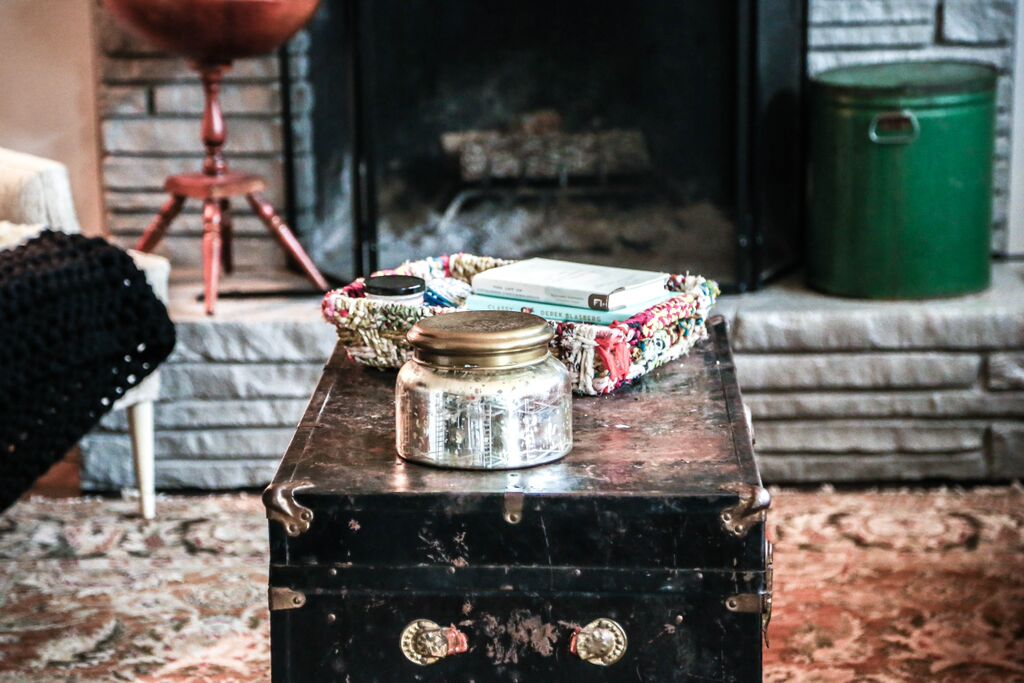
Next to the couch we have a couple of side tables. Our main coffee table is actually an old trunk that stores all our Christmas ornaments, so it's handy too! On the side table you'll notice my love/obsession of ceramic dogs. Ceramic animals in general are welcome in my home. I may or may not have a large vintage ceramic chicken collection. *cough cough*


Next up is the fire place! I found these old paint by numbers pictures already framed at one of my favorite local antique shops. It's called River City Trading Post in Jenks, OK and about half of my home is from them. We purchased the ladder there, one of my favorite things, as well as more ceramic dogs on my fireplace.


 I also love old books. We have a great used book store that sells old encyclopedia sets by the foot. Basically, you grab a stack, they measure it and it ends up costing about $12 for a set of encyclopedias! A steal of a deal. And a few more ceramic dogs *sigh*


Next to the fire place we have an old yarn holder with some Anthropologie accessories, and a mid century modern chair. The blanket is crocheted, by me, and it is probably the warmest blanket in the entire world. 


And lastly, the top of the piano has some of my most treasured old clocks, and a funky glass head I found at River City. It was too strange not to buy. The mirror I found at our local flea market, and our wooden bowl is from an estate sale. I would also like to point out that our TV is mounted to the wall. I always think a mounted TV looks better than one on a stand. I can say that because we started out with one on a stand, so that gives me the right. 

Anyway, this is my cozy living room. I love it so much, it's been such a treat to style and decorate. A HUGE thank you to my dear friend Rachel for taking these pics, and also for encouraging this blog. Without her, this never would have happened! 

xoxo Sallie


DIY Embroidered Napkins


The other day I stopped into Anthropologie to kill some time, and came across these napkins. I love cloth napkins, they make me feel so fancy, but usually when I have money for that sort of thing, I find myself drawn towards clothes. Who could blame me? After looking in my craft room, I found I already had all of the supplies needed to make myself a set of embroidered cloth napkins. There was just one thing left to do--channel my inner Martha Stewart and stitch, stitch, stich, and then throw together a 5 course meal to test them out. These are really so simple, here are the details.

The Players
You will need the following

1. Fabric  - I used linen, but cotton is swell, too
2. Embroidery thread
3. Embroidery Needle
4. Rotary Cutter
5. Ruler
6. Pins
7. 4" Embroidery Hoop
8. Sketch paper & pencil
9. Sewing machine
10. Iron & ironing board
11. Scissors

Step One: Using your rotary cutter and ruler, measure and cut your fabric. I made my napkins 14" x 10". After sewing they were 12" x 9".


Step Two: After your desired amount of rectangles have been cut (my heart's desire was 6), it's time to fold the edges! Using your iron, fold each edge over 1/4 in. and then fold again. Pins are helpful here too, sometimes those edges come loose as you sew.


Step Three: Using a thread that's close in color to your fabric, sew up all the edges. Be sure to do double stitches on the bulkier corners, so that your napkins hold up and have a nice long life.


Step Four: Now that all the sewing is done, it's time to decide what you want to embroider on your napkins. I went botanical, but there are lots of options. You could follow the Anthropologie version and do monogram--the sky is the limit! Once you have the number of designs you want, now comes the fun part.


Step Five: Using a pencil, I could not for the life of me find one in my home, so I used a felt tip pen, carefully draw your image on your napkin. If using a pen here, stay light with your pressure so the ink doesn't bleed through. You could use carbon paper here and trace over your original drawings, but as I was out of carbon paper I decided to go freestyle with just my amazing hand-eye coordination.


Step Six: Now the super fun part! It's time to embroider! Using you small embroidery hoop, frame your image, thread your needle, and start stitching. Tons of different options here, I went with a simple chain stitch, you can kind of see the process below. If you know nothing about embroidery, Sublime Stitching is one of my favorite places for ideas, inspiration, and tutorials.


Step Seven: Repeat with your other designs. Keep in mind that the best way to make the back of the napkin look nice is to limit the amount of "stops" and "starts" you have. It may take you a few practice runs to get the hang of it.


And there you have it folks! Embroidered napkins that have the potential to be in your family for generation after generation. Your children's children will fight over them long after you are gone.